Showing posts with label dismount. Show all posts

Sunday, January 18, 2015

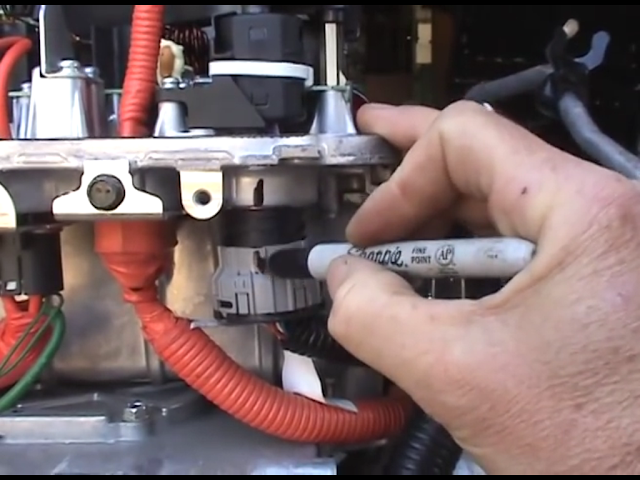
2013 Nissan LEAF Motor Unit Disassembly

Very interesting video I had in my Watch Later List on Youtube ...

See how the main drive train components are tied together very snuggly under the hood of the second generation LEAF


"A video on taking apart the three components of a 2013 Nissan Leaf motor unit. Some other information / projects on my website : siliconproductions.com"

Tuesday, June 25, 2013

Solar Install - SMA Inverter removed

After calling the SMA service center on monday, my contractor asked me today if he could come by tonight to get the inverter back
I helped him taking the 32kg inverter out of the kitchen cabinet and here is a picture taken right after the inverter removal

He should take it to the SMA technical service in France and hopefully another unit will be provided in exchange quickly ....


After he left, I measured the DC voltage again and it was lower, at 326V still, because of the grey shy and the sun coming down, it was around 9:15 PM

You probably noticed the AC cable plugged in : This is the extension cord bringing my ESS production into the solar sub panel, so that both productions - from the solar inverter and from the ESS - will then be measured by Wattson sensors 

Monday, March 18, 2013

Opening up the Tyco Kilovac EV200AAANA Economizer box

Saturday morning I decided to open up the Economizer box attached to the Tyco Kilovac EV200AAANA to see what this PWM circuit is made of; So I started by unscrewing the voltmeter and then the contactor
from the control board after taking the battery cables off its terminals


After that it was easy to remove this side box/cover


voilà


and here is the Tyco Economizer: it is actuelly a small PCB with 3307 reference number printed on it: KILOVAC 3-70-3209


and there are quite a few components soldered onto it !


Monday, July 16, 2012

LiFePO4 Cell disassembly

Yesterday I decided to open up this Mottcell 39 Ah LiFePO4 cell that reads almost 0V and has had problems in the past (the postive terminal was a bit swollen and disformed, and I heard some strange noises from the inside, so I put it away for good)
Like all the other cells in my Battery Energy Storage System, it comes from a Prius PHEV kit that can be found at Enginer.us
This cell is made of 3 13Ah cylindrical cells hooked up in parallel, let's see how: 

Removing terminals

0.08V => not a lot :-(

There is a top glued to the rest of the cell container

Scew driver to open

Looking good ...

Some white stuff... insultion foam or something like this maybe 


Top off


Terminal bars lifted, showing the insulation plate


Plate removed, now we can see the top cylindrical cell, taken all the width
Bad news, the white mastic is blocking everthing, and I can not lift the cells out of the shell


Cutting and cracking the plastic shell with saw & pliers


One side is gone giving me easier access and showing the way the cylindrical cells are connected to each other (reminds me my RC models battery, their cells were connected like this)


That's what I thought, once diconnected the cells show different individual voltages

It looks like the last one, at the bottom shows more damage than the other with this brown smelly electrolyte liquid/paste

The top cell: I thought it was damaged at first, but removing this cartborad cover I could discover it is not so much; The positive terminal and negative outer shell are insulated from each other by a one millimeter plastic ring (at the junstion of the cynlinder and the the top plate) 

The bootom cell is really messy ...

Please Share this Post if you Liked it !

Please Share this Post if you Liked it ! Thanks !
Related Posts Plugin for WordPress, Blogger...