Showing posts with label LiFePO. Show all posts

Monday, May 20, 2013

LiFePO4 ESS - User settings can be modified and saved in the EEPROM

Users can now change Variables in my DIY ESS program and save them in the EEPROM for the next runs; This is a major enhancement and I think it will be usefull
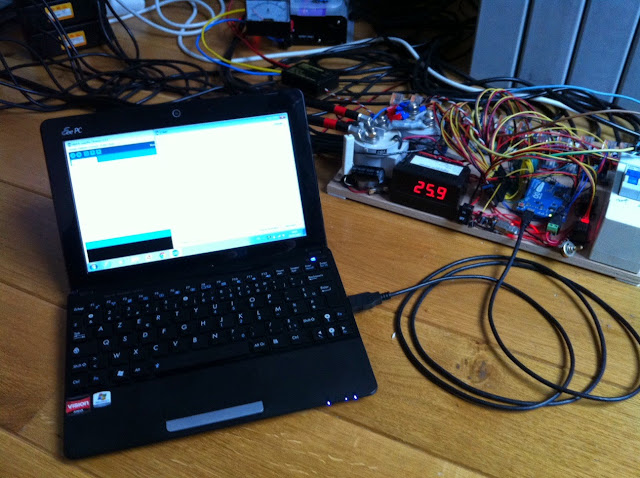

If necessary, the users will be able to plug their Mac or PC to the Arduino board via a regular USB cable and see the log displayed by the program


If some of the frequency, sensitivity, thresholds need to be adjusted, it can be done using a simple code letter and value:

i.e.: 'd100' + Enter will change the delay between two readings from the original 50ms to 100ms, and if this is happens to be a good value for the behaviour of his ESS, the user can save it typing 'save' + Enter

The modified value(s) will then be located in the Arduino's EEPROM (Read Only Memory) and will reside there even if the power is switched Off, for the next runs

At start up, the ESS arduino board program will read values stored in the EEPROM and use them 

Typing 'config' + Enter, the program will display all the variables stored in the EEPROM


Monday, January 14, 2013

ESS - Crimping Sunday with New 50mm2 Cables & Lugs

Last friday, I went to the supermarket (Leclerc) next to my office after lunch and found cheap gasoline car startup battery cables; I got this set of 2 3.5m 50mm2 cables for 17.50 EUR only :-)

I also found a professional store nearby where I  could buy all sizes (almost) of copper lugs


I then dismounted the clamps to access the very end of the cable


and was able to remove the already crimped terminal


there was a hole in it already, a 6mm one, so I redrilled it to 8mm to fit my screw terminals


After that I decided to try my Christmas gift, the hydraulic crimping tool, on a doubled 16mm2 cable with a 25mm2 lug


It was very easy to use, a kid could use it, because it does not require a lot of strength ! very smooth ...


It is a bit crooked but the next ones will be fine, I just need to carefully allign the two crimping blocks


Double cable screwed in place between the battery bank positive terminal and the Tyco Kilovac contactor 


Then, I worked on the new cables and tryed to use the existing terminals by cutting their perpendicular sides ... Surprise ! Once broken, I realized the metal was not solid copper, but copper platted aluminum ! Now that's why it was cheaper ( BTW, Aluminum's conductivity = 60% of Copper conductivity )


In the end the remaining part was to hard to remove and the result was not flat at all, so I decided to cut the cable and crimp a new lug; Same thing here, the cable is made of copper platted aluminum ...


But the cable would not fit in 25mm2 lug ! The cable says 25mm2 on the insulation though...
Same problem with 35mm2 lug... I think it is 50mm2 and now I get it: they write 25mm2 because it is equivalent to 25mm2 of copper ... but to achieve this conductivity they need twice the section => 50mm2


I ended up removing what would not fit in a 35mm2 lug 


Detailed crimping process below:


I then had to cut the residual wires on the surroundings and installed it onto the grid tie inverters stack


and the other terminal of the contactor


I left the whole 3.5m of new cable length to test its conductivity with high amperage


After cutting, crimping and installing the negative battery to grid tie inverter stack cable (also 3.5m)


and then testing with full 1200W, more or less 50A-60A ... Well the doubled cable got lukewarm, and the two 3.5m new cables got lukewarm too, but less; I will have to cut them shorter I guess, and use 50mm2 lugs on both ends, but anyways it is much better than before where the simple 16mm2 copper cables were getting pretty warm to really hot !


Wednesday, December 26, 2012

Vextrix VX1: NiMH to LiFePO4 Conversion using Winston Batteries

Interesting NiMH to LiFePO4 conversion of the Vectrix battery pack using Winston Batteries


2 cells fit perfectly ...


I would not use any cell shunt balancer though, always a bad idea...


2nd story + some electronics ...


Saturday, March 17, 2012

LiFePO4 Cell Bottom Balancing Device - First try

Few weeks ago, after receiving my programmable dual relay digital voltmeter, I set up what Jack Rickard had showed us on EVTV, with an automobile 12V relay, some switches, and taking a 12V solar battery as a source of power

In the background you can see my former Enginer PHEV Prius kit, with their new BMS V4 


Sunday, March 11, 2012

LiFePO4 Energy Storage device

This vidéo was shot at the beginning of my work on this system


Now this is what it looks like, after removal of another BMS, use of more powerful grid tie inverter (500 W) and use a of programmable dual relay volt-meter


This morning, I will shoot a video about the discharging step, where energy in the battery bank will be used to feed electricity to my home system, at a steady pace, reducing my use from the grid

I will go into details and the steps later on

To be continued... 

Please Share this Post if you Liked it !

Please Share this Post if you Liked it ! Thanks !
Related Posts Plugin for WordPress, Blogger...