Showing posts with label fan. Show all posts

Sunday, August 25, 2013

Tuesday, July 30, 2013

DIY ESS - Fan Grid arrived in the mail

From Ebay for 1€ I think, perfect finish and protect the warm air exhaust from the ESS Metal Cabinet


Very cheap grid, good quality, and fast shipping :-)

Sunday, June 16, 2013

DIY ESS - Variable Fan Speed with PWM & Thermistor

This morning, I am experimenting and trying to find a simple solution to make the ESS Fan accelerate when the temperature in the Metal Cabinet is rising and slow down when it is back to an acceptable value

As you already know, the fan is controlled by a PWM kit that I soldered 2 weeks ago and I can adjust its speed using the PWM kit potentiometer; That is already a good step, but I would like to make it better

In the Arduino starter kit I got a year ago, there was a Thermistor and I used it between the negative and the variable output pin of the potentiometer: It looks like it is working, and you can see the pictures and video where I increase or decrease the fan speed using an ice pack and a soldering iron to make the Thermistor resistance change based on the temperature changes


Thermistor temperature

Ice pack temperature

Soldering iron temperature

Cooling the Thermistor after heating it up

Fan speed changes ...

Wednesday, June 12, 2013

DIY ESS - Fan hole enlarged for more air flow

After monday night tests, last night I drilled a big hole to get the hot air out

I drilled many small 2.5mm holes next to each other and cut the metal

not perfect, but it is well opened now

and after testing at full blast, it really dissipates the heat geenrates by the 7 chargers or the 8 grid tie inverters; Now I will have to find a grid protection for this opening ...

Monday, June 10, 2013

DIY ESS - Soldering of the PWM kit and Using it ... for the Fan Speed Control

Last sunday, I finally took some time to solder the PWM kit I got few weeks ago


A little test with a 12V AGM battery and a small motor

It worked !

But when I tested it instead of the capacitor and resistor on the Tyco Kilovac EV200A1ANA, then I got smoke and blew the 2A fuse on the 24V line ... after hearing the contactor having difficulties to close properly with its usual big clap. There must have been too much consumption from the coil to close I guess and the MOSFET was burning hot !

So I kept the resistor & capacitor Economizer solution for the Kilovac, tested for sevral weeks now, and   used this PWM kit for the fan speed control on the metal cabinet, manual control that is for now

After long tests with the fan at different speeds, nothing was over heating, and it seemed like a good match

So I plugged it on 24V line of the ESS to further test it with the voltage it will get when mounted in line on the switched 24V

24V taken at the source, right after the 2A fuse

Tuesday, June 4, 2013

DIY ESS - Fan holes drilled & spinning test

A bit noisy, all this drilling, but it is done !

First: markings


Second: small holes drilling (2.5mm, easier)

Third: bigger holes (7mm)

A little test with a 12V AGM battery: it blows well, enough to egt all the hot air out when charging or discharging I think; And it is very quiet :-) with or without the doors closed

Two extra holes to put screws to hold the shelf, otherwise it just falls (!)

I bent a little bit the base of the second shelf and put it on top of the bottom metal sheet


Bending on this corner side


Monday, June 3, 2013

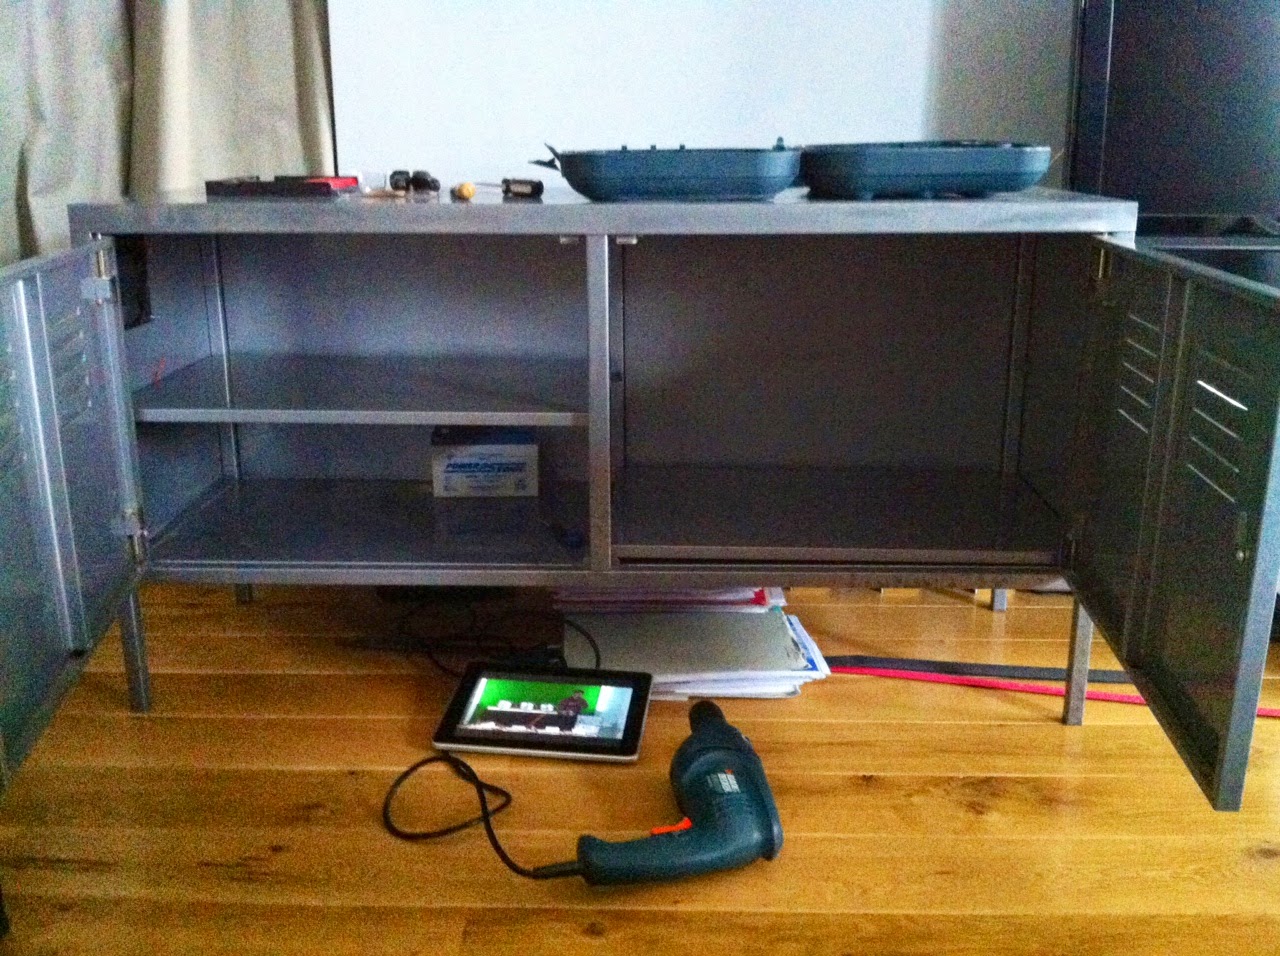
DIY ESS - 24V fan mounted in the metal cabinet & components destinations

Update on the IKEA metal cabinet :


I drilled 4 holes to mount the 24V fan in the upper front left corner of the metal cabinet last night ...


 ... since the grid tie inverters should be positionned on the left upper shelf

Underneath, I will place the Control Board / EMS 

On the right, there is room for the 8 cells battery pack, and even for double, 16 cells, to upgrade to 10kWh, maybe later, if necessary ... 

Also, the right shelf is not used since the cells are 30cm high, but I found that putting it on top of the right bottom (rather thin) piece of metal will make the whole thing stronger to hold the 6*8 = 48kg of the battery pack

Sunday, June 2, 2013

DIY ESS - Found the metal cabinet & 24V fan

Found it the same day ! 
I found this IKEA metallic cabinet half price yesterday in the exact same neighborhood we were hanging out in, Marais in Paris
We put that in the LEAF and went back home

I chose this model out of all the IKEA cabinets because it seems to be available worldwide, and can hold 5kWh pack and 10kWh pack, so you can upgrade later if you want twithout changing this part


Right after that, I went to an electronic parts store not far and got a 24V big fan to get all the hot air out of this new enclosure for my system; Also got the matching long 4mm screws and bolts, some 2W resistors, and a red long piece of heatshrink

It is pretty configurable, but I think I will remove all the shelves and leave it empty

So all this has to go in there

And all the heat generated by chargers or grid tie inverters, should get out through holes I will drill in the upper part of the cabinet, and holes already exist at the very bottom for air intake

Tuesday, January 15, 2013

Vectrix Charging at Work - From Empty To Full

Few days ago, after coming back from vacation , the timer on my Vectrix did not work - because of a low lithium button battery - and the night charge of my Vectrix did not take place ...
When I discover this in the morning, I usually go to work, but slower, trying to save up my battery to make sure I get there and charge in my office building undergound parking

Well, this time, as I was arriving, I got the low battery solid red light on the dash and sure enough the battery gauge went to empty as soon as I turned the bike OFF and ON again; I do not like this because everytime I get this low, the charging process is taking very long because the NiMH battery pack over-heats ....

Here are the different phases of charge my Vectrix went through during that day:

It starts with a pack at 125V and a CP - Constant Power - charge phase where the charger gives out all the power it can to charge the battery pack in bulk; 153 means it is trying to reach 153V as a target voltage; The speedometer tells us that there are 12A -on 120 / 10- going into the battery pack right now: 12A x 125V = 1,500W the  charger can deliver; Battery cells temperature is pretty low at 13°C

An hour and ten minutes later, voltage went up to 143V and Amps went down to 10.5, still 143V x 10.5A = 1,501W, always the same 1500W the charger is pushing into the battery pack
Temperature went up 3 degrees only and we gained 7 bars on the right - voltage - gauge 

After maybe two to two hours and a half, came a TR - Transition - charge phase where the charger has quit because it reached 153V, and the whole pack is being cooled by fans only for a determined period of time (countdown here showing 5mn and 32s): the cells temperature is now at 21°C, but maybe it got higher as it was closer to 153V; We now have 11 bars on the voltage gauge

My Vectrix plugged  in  a simple 220V outlet at work


After the end of the TR phase, the charger goes into CC - Constant Current - phase and delivers only 3A and tries to complete the charge to the top; Note that the cells temperature is up again at 27°C

Now the charger has quit because the cells temperature got too high - here showing 43°C !! and maybe went up to 50 ? - and a CO - Cooling - phase is taking place and I have the red battery sign flashing a now to let me know that there has been an over-temperature situation; We are near the complete state of charge though, with 14 bars and 145V

Towards the end of the afternoon, I saw the charge mode go into EC - End of Charge - even if there were only 14 bars of voltage indication (not 17 bars for full)
Because the cooling had stopped, the temperature went up to 46°C, and the red battery sign was still flashing; I re-started the cooling process by turning th bike ON -and OFF to remove the key- and let fans blow until I finally left the office

Leaving the office ...

Temperature went down to 40°C, which is still a lot, so I decided to ride smoothly and accelerate softly not to go into an over-temp situation again

...

And finally arrived home without any problems, and a good state of charge left (2 bars used only), 135V, and a little temperature decrease down to 38°C

I started charging right away (my timer is out of order, so no other choice)

went for a smoke outside, and came back after 13mn and we are now at 142V and 33°C (the fans do their job while charging)

...

The next morning, the Vectrix was fully charged and the temperature was still a bit high with 33°C and the red flashing battery warning ON ... it is just a warning

Next day again, arriving back from work, I am back to a regular situation, 5 to 6 bars used for my daily round trip commute


Please Share this Post if you Liked it !

Please Share this Post if you Liked it ! Thanks !
Related Posts Plugin for WordPress, Blogger...